Lab 2: Black box testing
Purpose
In this lab we will be working with specification based or black-box testing at different levels. At unit level in part 1 and at system level in part 2. We will also be trying out different tools and frameworks to support test writing and execution.
For this lab you will be working in Java and using Eclipse as your development environment. You are expected to install and try some additional software during these tasks, for the purpose of building and testing small code examples. Testing software is an art as well as a craft, with practices and techniques that you will learn about iteratively through these assignments. Software testing is not a practice that we should engage in only at the end of a development cycle, but should be an integral part of development. Therefore, some parts of the lab assignment will require you to write some software in order to practice testing during development. Software testing itself also changes the mindset of you as a developer, and forces you to consider, just as a scientist, how you can verify that your software works as you think it should. Indeed, it makes it paramount that you can phrase clearly what you mean that your application should do and why.
For this lab, parts 1-3 are mandatory for the passing grade, part 4 is for those aiming for a 4 or 5.
Preparation
You will use Eclipse as part of this assignment. If you have not seen this development environment before, it is a good idea to follow some tutorial. functionality of this development environment, but also its facilities for managing extensions, for the IDE itself as well as for applications built with Eclipse. When installing plugins for Eclipse, you do so from within Eclipse using the Update Manager
Additionally, you may need to read a tutorial on Java if you have not encountered it before. Hopefully, with a background in other object-oriented languages, there should not be any major difficulties. It is expected that you spend some time getting to know both the language and development environment before you start. In part 1 below, you will be introduced to the basic techniques for testing an application, and learn how to use unit testing frameworks to test programmatically.
Part 2 focuses on how to use testing as a practice during development, so that we can proactively write tests, even testing parts of our application without having all functionality implemented. Here, we practice creating testable, loosely coupled code. In part 3 you will inspect your application with Eclemma to understand the extent to which the code is testable at the unit level, and possible consequences this may have. Finally in part 4 you will apply the techniques you have learned to write a complete set of tests for the insurance application.
Part 1, Unit testing: xUnit basics - Mandatory
During this lab you will be working with a car insurance application. In part one we will start by focusing on testing the logic in the main methods of the insurance service. Fork the small insurance application implementation.
Import it in Eclipse as a Maven project (you can also add a Maven nature to the project after importing).
Once you have imported the project in Eclipse, refresh the project using Maven to get all the dependencies.
One of the goals of test frameworks is to help us keep tests and code separate (not mixing the tests into the application) and to run the tests in a standardised manner. Therefore we will devise separate tests that do not run the application from the Main method, but rather use special classes and methods in those classes to run specific methods of our program. Frameworks for running standalone tests like this are often called xUnit frameworks, as they share a number of features with the original SmallTalk test framework SUnit, and usually only differ in name by the first letter of their names, often corresponding to the language or runtime environment for which they are written JUnit, Nunit and so on). In this part, we will make useof JUnit which is Java xUnit test framework that is natively supported by Eclipse.
On the JUnit website, there are introductory exaples that show how JUnit works, but in general, it works like most other xUnit frameworks:
-
There is a test runner, as in a separate executable that loads your tests as a library together with your main application, analyzes the test library to detect test classes and specially annotated methods in them.
-
It conducts one-time initialization procedures to setup the test environment, followed by per- test initialization for each test method invocation.
-
It invokes test methods in isolated threads, and listens for abnormal termination through exceptions to detect failing tests. Finally, it reports the results of running tests in a separate view or in connection with either tests or code.
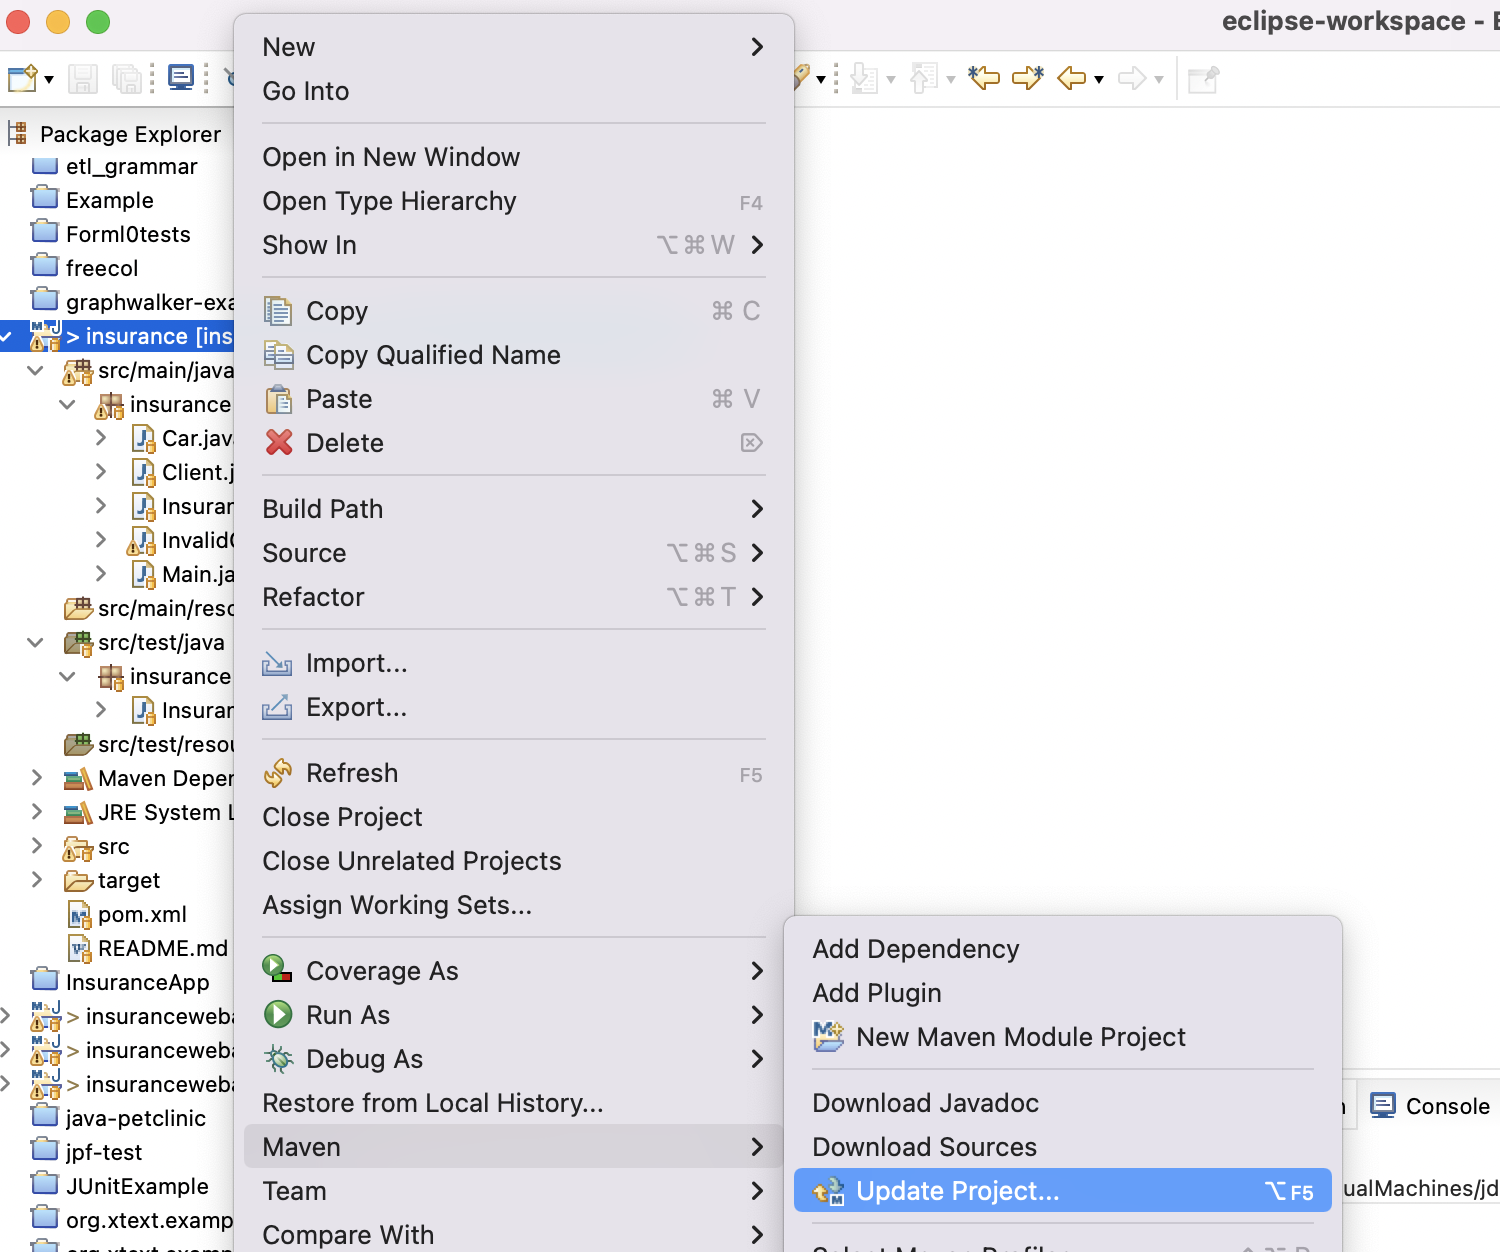
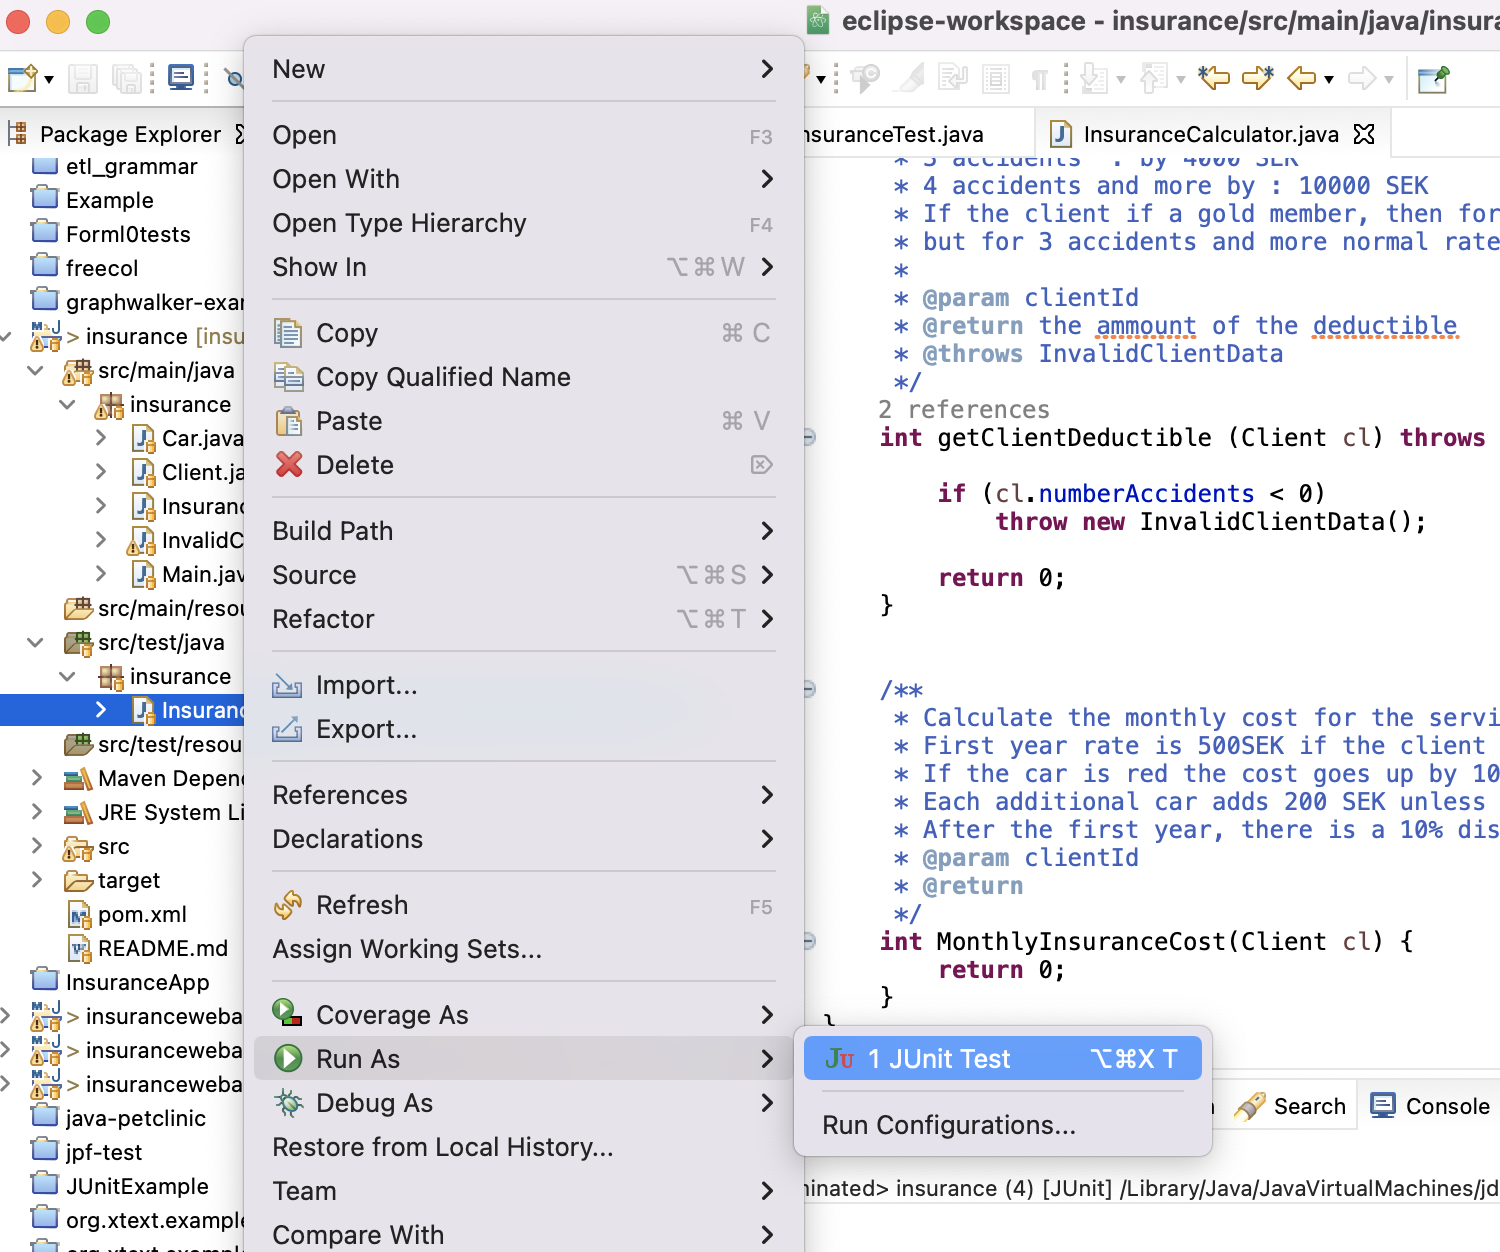
As a developer, you may invoke the test runner from within
your IDE, or use build-tool-specific commands for running your test suites from
the command line. In this exercise, we will only look at what happens when we
use the test runner from within the IDE (Eclipse). Here is what it looks
like when you run the tests through the Eclipse GUI:
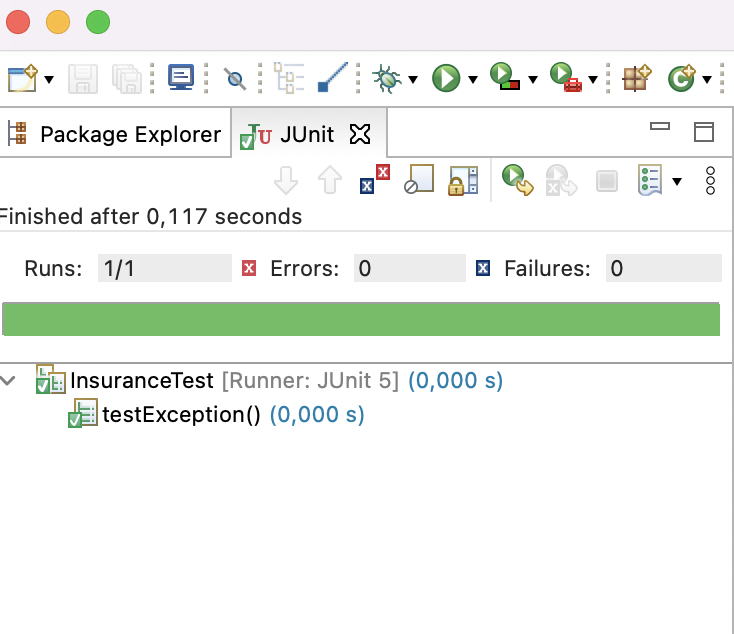
The results appear in the JUnit view:
Assertions can be used in Java Unit tests to check that the software under test behaves as desired.
In the InsuranceTests test suite add a number of test cases that you believe will exercise the two insurance application methods
and trigger all behavior that you consider interesting to test. Do not mind the
details of the implementation just yet, but write down your test cases as unit tests.
When selecting your test cases, think about valid and invalid data types and remember we want to test the program behaviour with incorrect inputs as well as with correct ones.
Write a short report documenting the strategy you chose to write your tests and what types of issues you were targeting in the application and connect your reasonment to the concepts we learned in the lectures.
It is good practice to write methods to tear down your test fixture. Add a teardown method to your test suite.
Implement the methods getClientDeductible and MonthlyInsuranceConst. This version of the methods takes a client object containing all the necessary information as a parameter.
Note your expectations along with the actual outcomes.
If you detect any issues in your application, make the necessary modifications to ensure all the tests are passing.
Part 2, Unit/Integration testing: Stubs and Mocks - Mandatory
It is a good practice to separate the logic of the program from the implementation of the data management. In the next version of the InsuranceApplication we will see a separation of these layers.
Start by forking the application. It is implemented as a REST-based web service written using Spring.
You will need Maven to manage the package dependencies. The application is built using Spring Boot, a framework for quickly building Spring applications. Once you forked the application and imported it in Eclipse, you can run the InsuranceApplication.
To test that your application is working, type:
curl localhost:8080/getClientData
in the terminal.
The current implementation is incomplete and in this lab we will be extending the implementation and applying different test techniques. You can adapt and reuse parts of your solution to the previous task.
Writing good quality tests is an integrated practice in contemporary software development, and testing can even be done before you write your main application code. This practice, Test-Driven Development (TDD), has a number of potential benefits:
-
You force yourself to be specific about what you see as the desired functionality of every component before you write it, which helps you think clearly about the functionality.
-
You will write testable code, which substantially helps in making your code better by avoiding high coupling between components.
-
Your code will be in a working state earlier with smaller tests, which will help you gain confidence in your product, and reduce the time to debug later. See paper by George and Williamsfrom 2004 on the results from an experiment where they studied the effects of TDD.
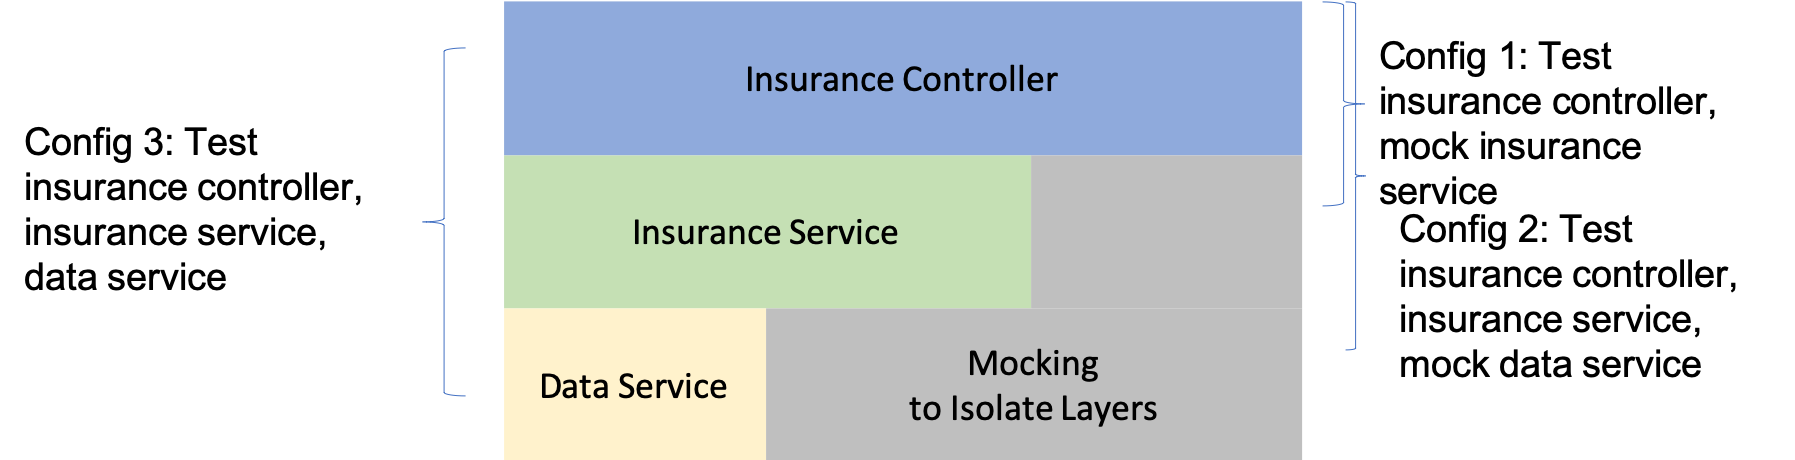
We will see in this exercise we will see how we can isolate different
parts of the insurance application for testing. It can be difficult to locate the source of an error if
our tests require both the controller logic, the insurance service and the
client management service to be developed before we can test the controller. To
test the controller logic separately from the functionality we have
yet to implement, we will therefore create
a test stub to
fake the functionality of the InsuranceController before we have a
working implementation of it.
The idea is that we substitute our fake implementation with a real one later once we have developed it.
The first step is to write two test cases to describe the expected behaviour of the controller.
Add them to the InsuranceAppTests class.
In InsuranceController update the methods to properly make
use of the InsuranceService.
In order to simplify swapping out mocked implementations of objects for real implementations
we define them outside the tests in testing configurations. Use Mockito to create a stub
of InsuranceService, and make sure that
your stub acts consistently with respect to storing and retrieving
client information. An invocation of a method to store data should result in
those values being retrieved later, for instance. See
the Mockito
tutorial on Vogella for inspiration or the Spring tutorial.
Update the testing configuration accordingly.
Check that the tests run correctly.
Part 3 Testability - Mandatory
In this final part, you will inspect the effect of [high coupling] high, as indirect dependencies between concrete classes, on your ability to test software components in isolation.
We will use the JaCoCo code coverage engine in the EclEmma Eclipse plugin to provide information about the extent to which we exercise all statements or branches of the code examples.
Run the unit tests with
EclEmma to obtain coverage results for your application. See example
screenshot below:
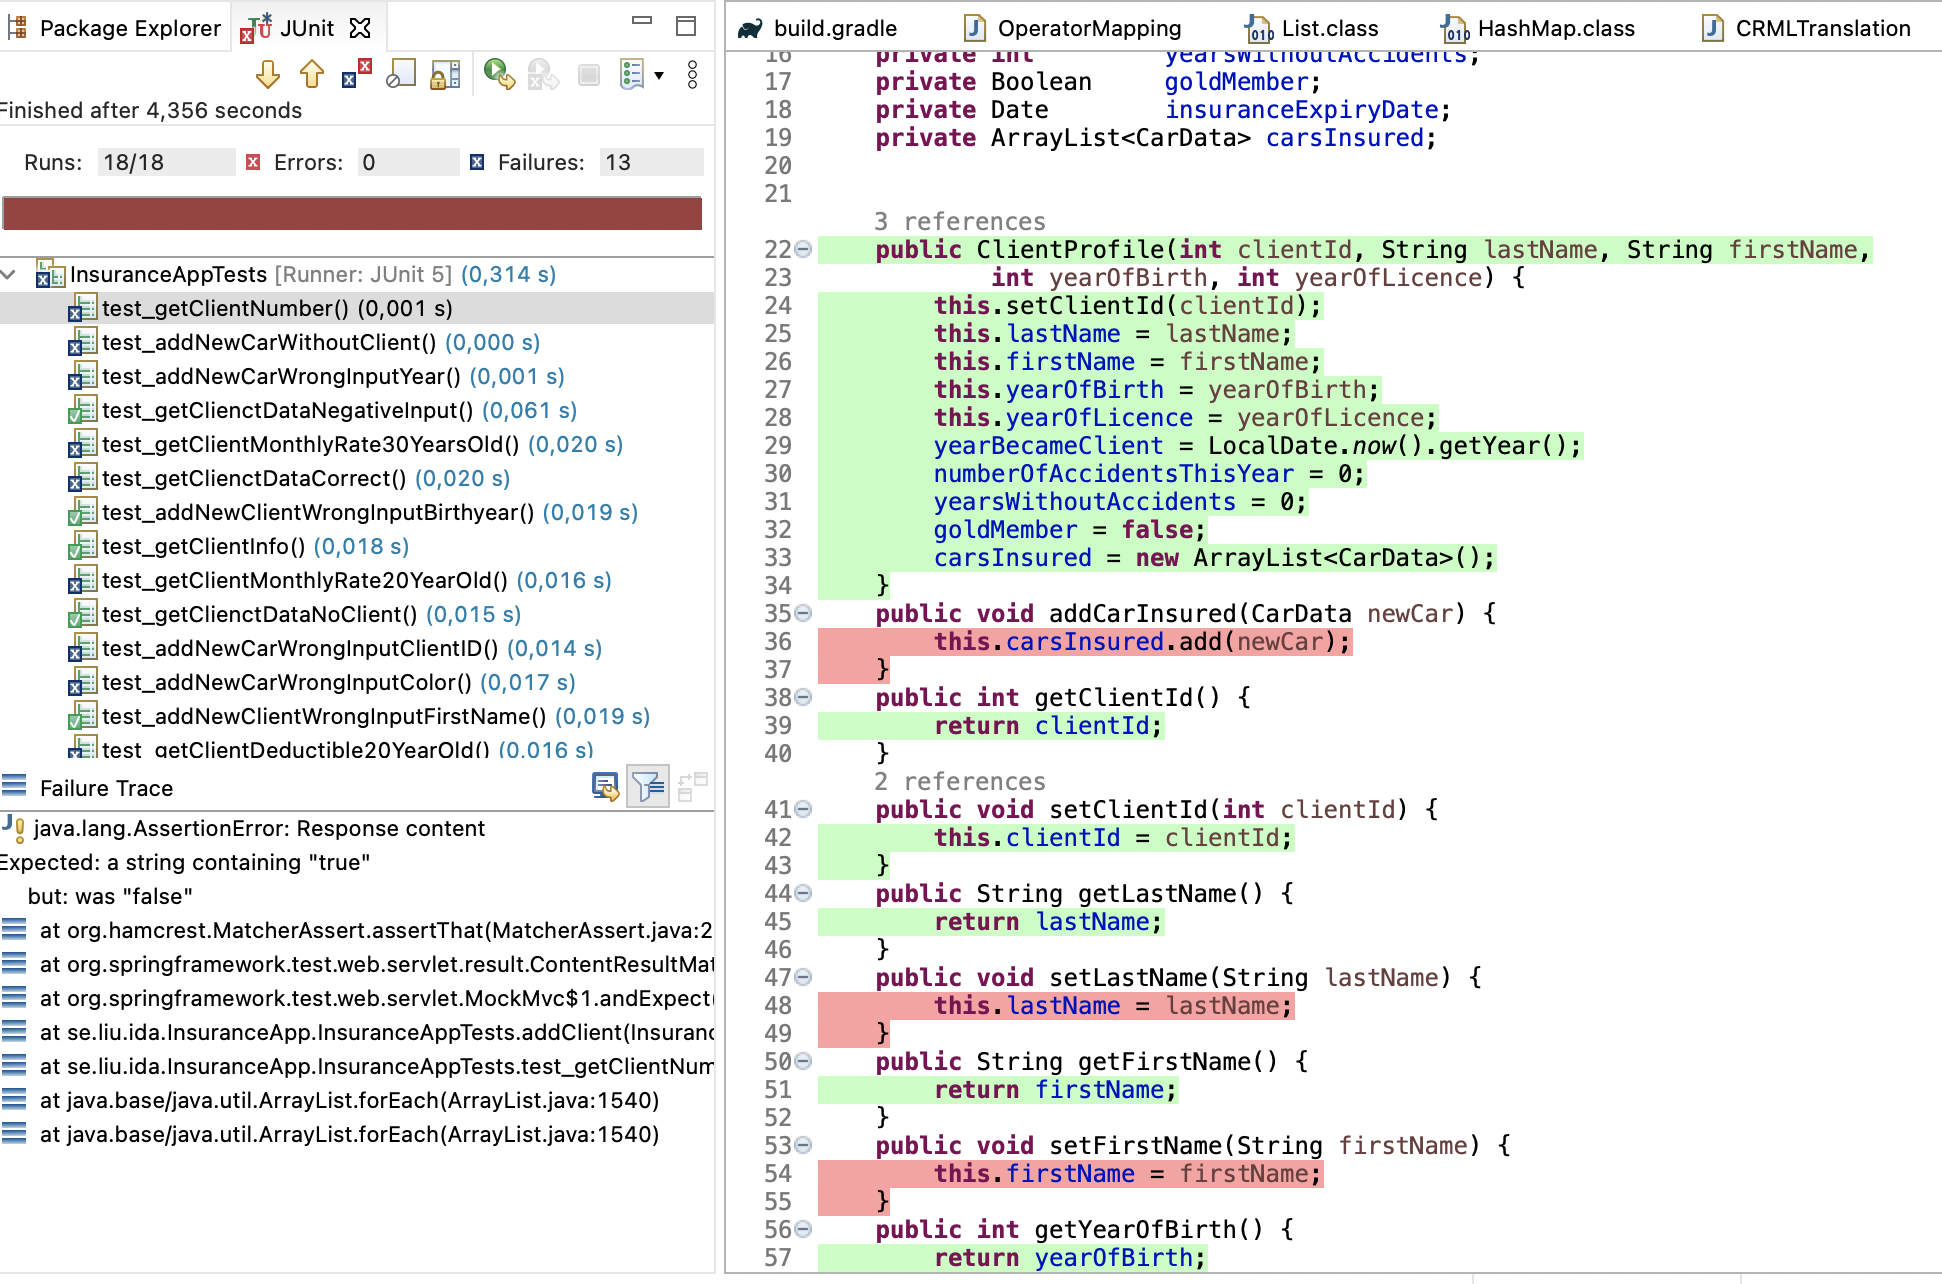
You will notice that some parts are not completely tested. Note the coverage of the test code as well: have all statements in the code under test been executed? If not, what does that tell us?
Part 4 - Optional
For grades 4 and 5.
In this part you continue your work in part 2, to extend the test suite. It is not required that you test the application exhaustively, however the tests you choose to write should be coherent and representative of a test-strategy. In the lab report, you will write a page of explanation for the tests you chose to write and for additional tests that might be necessary (you should include concrete suggestions).
Once you have extended your test suite and verified that all controller tests pass with
your stubs, create tests for, and a complete the implementation of,
the InsuranceService interface. Now you will be mocking the ClientManagementService.
Make sure to write your tests first, and the implementation
later, TDD style. Now, add integration tests that verify that your
controllers work with the new implementation
(small-scale integration tests).
In the last step write the tests and implementation for the ClientManagementService.
In addition to testing correct behaviour, Mockito also allows to test the correct execution flow.
Add some tests to verify
that the interactions between the layers are correct.
Below is a flowchart roughly describing how to handle the different parts of the application described above.
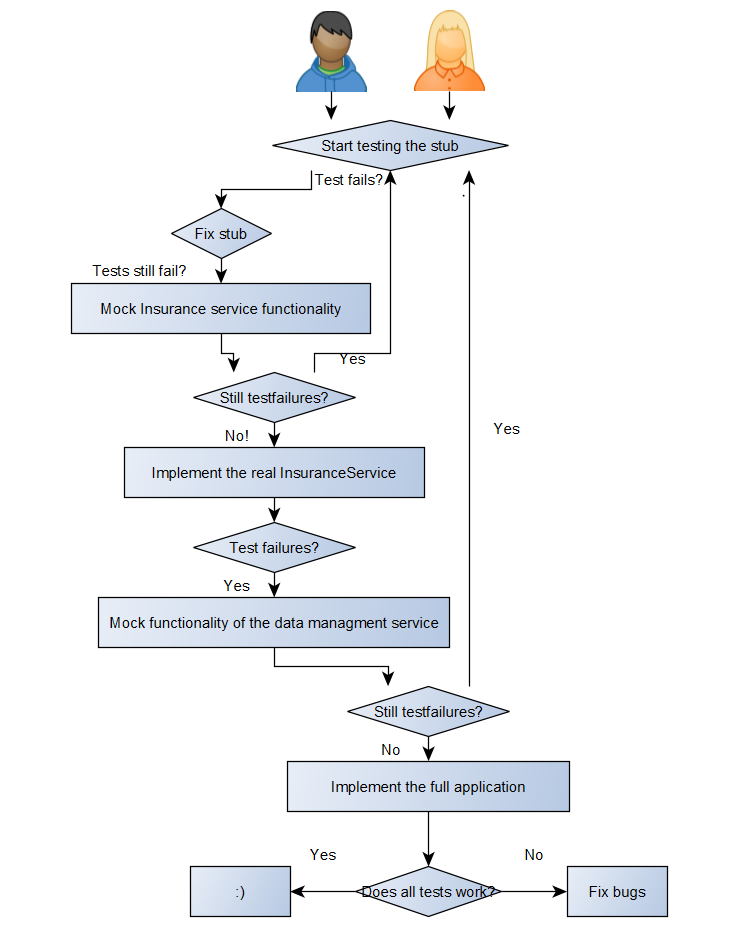
The stub here refers to the given implementation of the controller.
Now test the coverage of your test suite with EclEmma again. Do you get the coverage you expected? Motivate your answer and explain what test cases need to be added if any to improve the coverage.
Reporting your results
See the instructions on the course page general submission instructions.
-
From part 1, you will need to push your tests cases to Gitlab and include in your report screenshots that demonstrate that your tests pass and explain your testing strategy and any implementation errors you detected with your tests.
-
From part 2, you will need to provide your two test cases of
InsuranceControllerby uploading the code to GitLab. -
From part 3, you will need to provide a paragraph summarising your results and a screenshot of running EclEmma on your tests.
-
From part 4, you will need to provide your test cases of
InsuranceControllerat the different levels, along with your stubs, your implementation of the Insurance and Data services by uploading your code to the Git Repository. In your report provide a screenshot of your successful test cases and a motivation for your choice of test-cases.